Lesson 1: Creating Your First Website with Quarto
Overview
- You will learn to create a personalized website using Quarto. You will build a foundational About Me page, add new sections like Blog Posts and Contact, and render your site with
quarto render. You will also be introduced to working with to YAML files.
Learning Objectives
Students will know how to create and have a basic website using Quarto
Students will know how to add new pages to their website and work with YAML
Students will be able to render the website using
quarto render.
Lesson
Prerequisites
Why Quarto for Creating Websites?
Reproducibility: Quarto ensures reproducibility by combining content, code, and results into a single document. This is vital for maintaining consistency and transparency in web development projects.
Flexibility with Markdown and Code: Quarto empowers users to seamlessly blend Markdown for content and code for interactivity. This flexibility allows for easy integration of data analysis, visualizations, and narrative—all within a single environment.
Effortless Document Structuring: With Quarto’s intuitive structure, creating and organizing pages becomes straightforward. Its simplicity enables quick addition of new content, making it an ideal choice for both beginners and experienced users in the website development realm.
Getting started with building your first website
Open Visual Studio Code (VS Code)
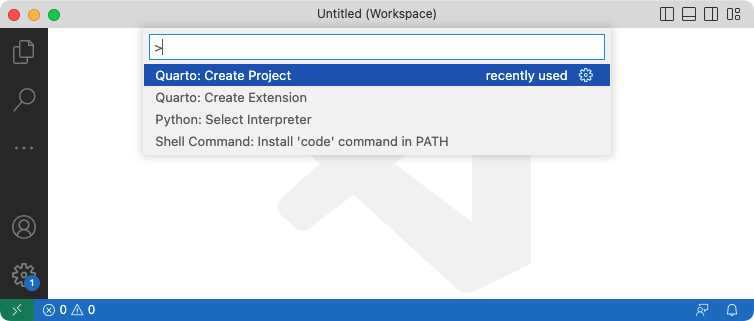
In VS Code, execute the Quarto: Create Project command from the command-palette:
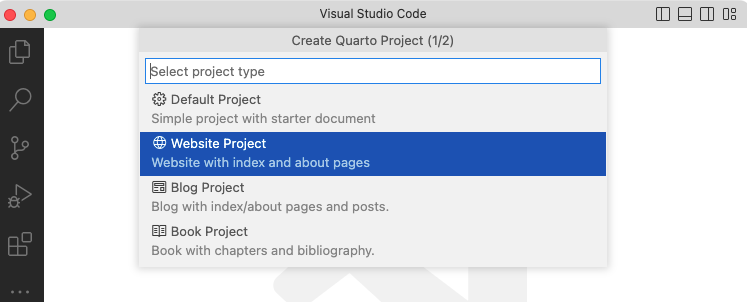
Executing the Quarto: Create Project Then, select Website Project:
Selecting Website Project You’ll be prompted to select a parent directory/folder to create the project within. Then, you’ll be asked to name the directory/folder for your website project. For example, Quarto Project:

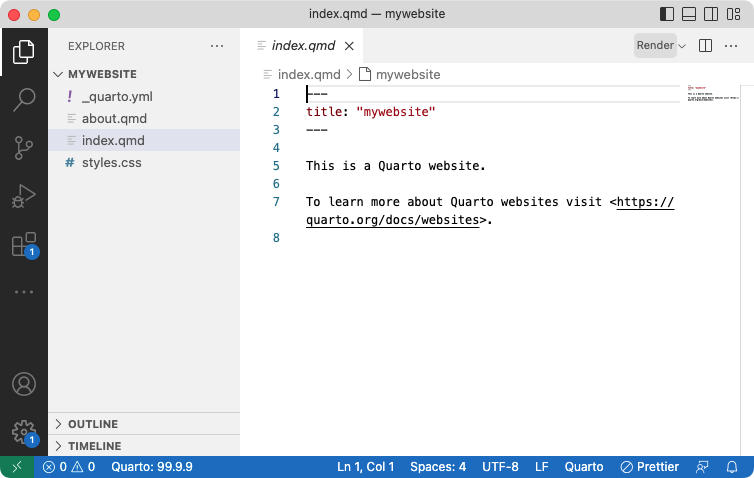
Selecting Folder The new website project will be created and opened within VS Code. Click the Render button to preview the website:
Rendering the website
The
quarto.ymlfile holds metadata such as the title of the document, author information, and other details that help describe and identify the document.
YAML Navigation In the above image, the left side contains a YAML file that contains the metadata.
The title of the website is called Quarto Website,
The navbar is essentially a navigation bar that helps users easily navigate through different sections or pages of the website. Each item in the left navigation specifies a page or a link, and the text attribute defines the text that will be displayed for that link.
If we want to add two new pages (blog_post.qmd and contact.qmd) to the main About Me page we first create the qmd files, then add the files in the navbar section in the .yml file.

Adding Pages
Conclusion
Great job with this lesson! By now you should:
Know how to create and have your website running locally with Quarto.
Know how to add more pages to your website.
Know how to work with YAML files in Quarto.