Lesson 2: Hosting Your Website On Github
Overview
By the end of this lesson, students will be able to create a GitHub repository for their website and configure the basic settings for hosting on GitHub Pages
Learning Objectives
Students will be able to Create a repository for website and initialize a GitHub Pages branch.
Students will be able Upload Your Website Files
Students will be able to view website
Lesson
Background
Hosting on GitHub typically refers to using GitHub Pages, a built-in service provided by GitHub for hosting static websites directly from your GitHub repository. GitHub Pages is a convenient and free way to showcase your projects, portfolio, documentation, or any other static content.
Lets begin
Log in to GitHub.
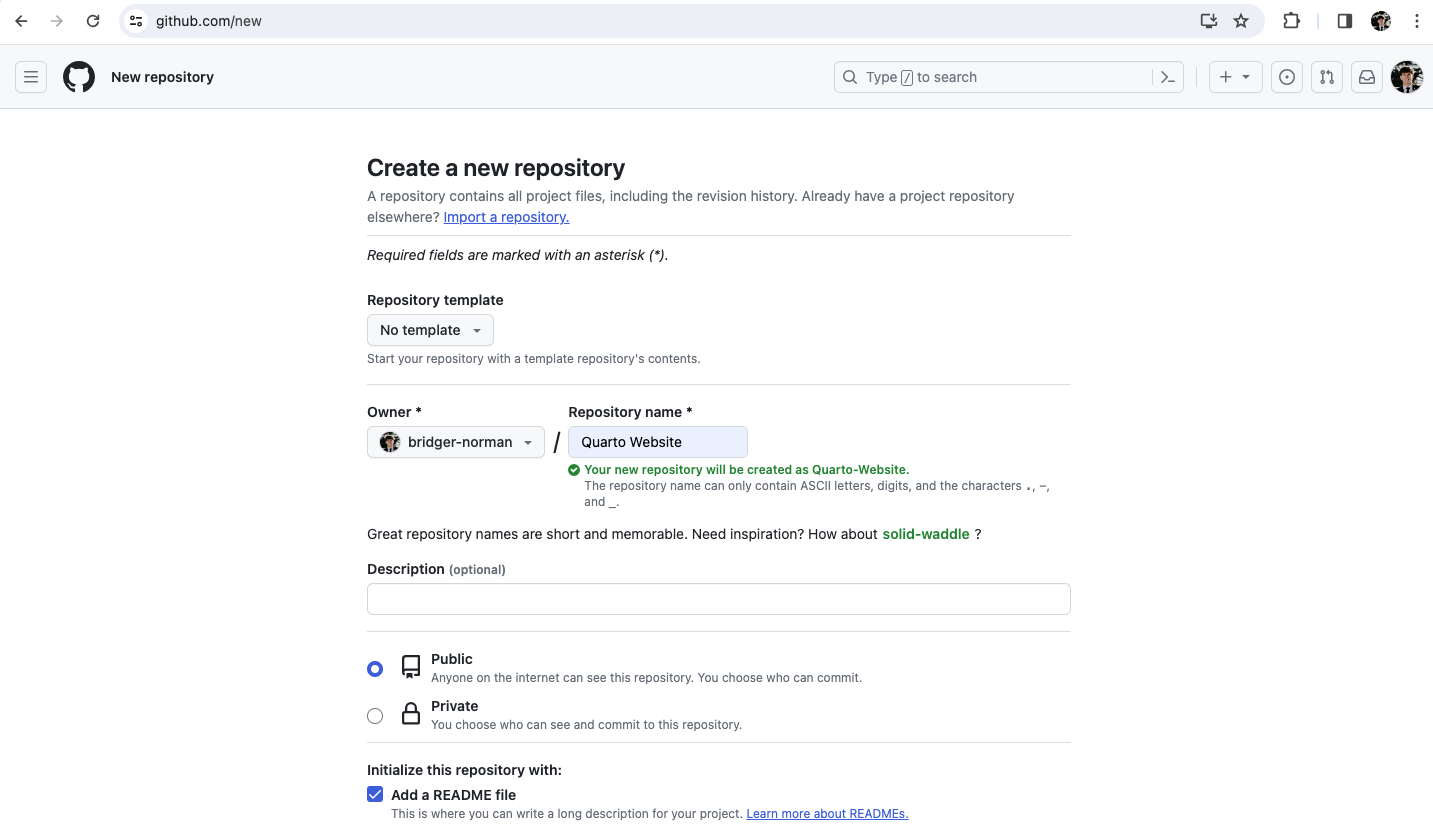
Create a Repository: Go to your GitHub profile and click on the “+” sign to create a new repository. Name your repository(choose any preferred name but note this name will show up in your site URL address).
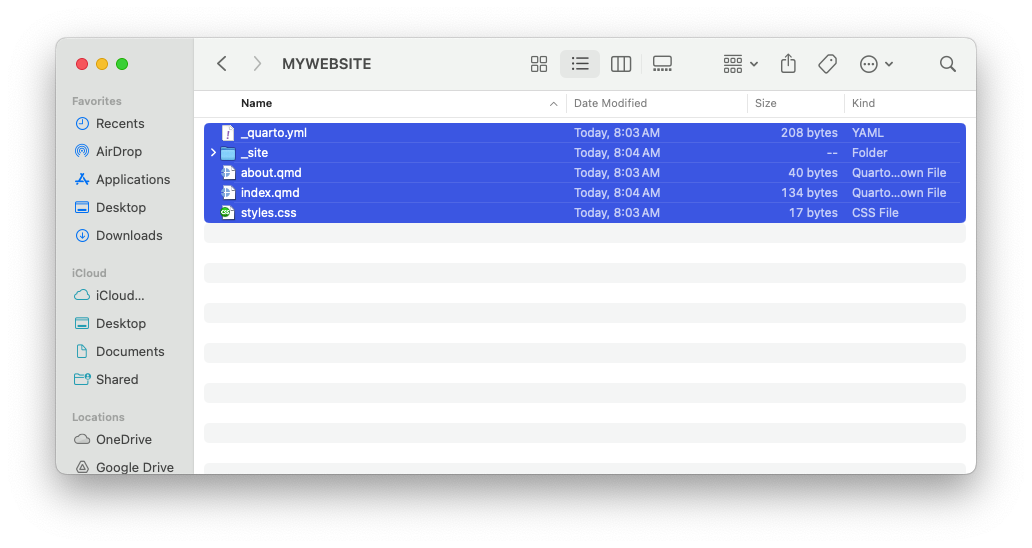
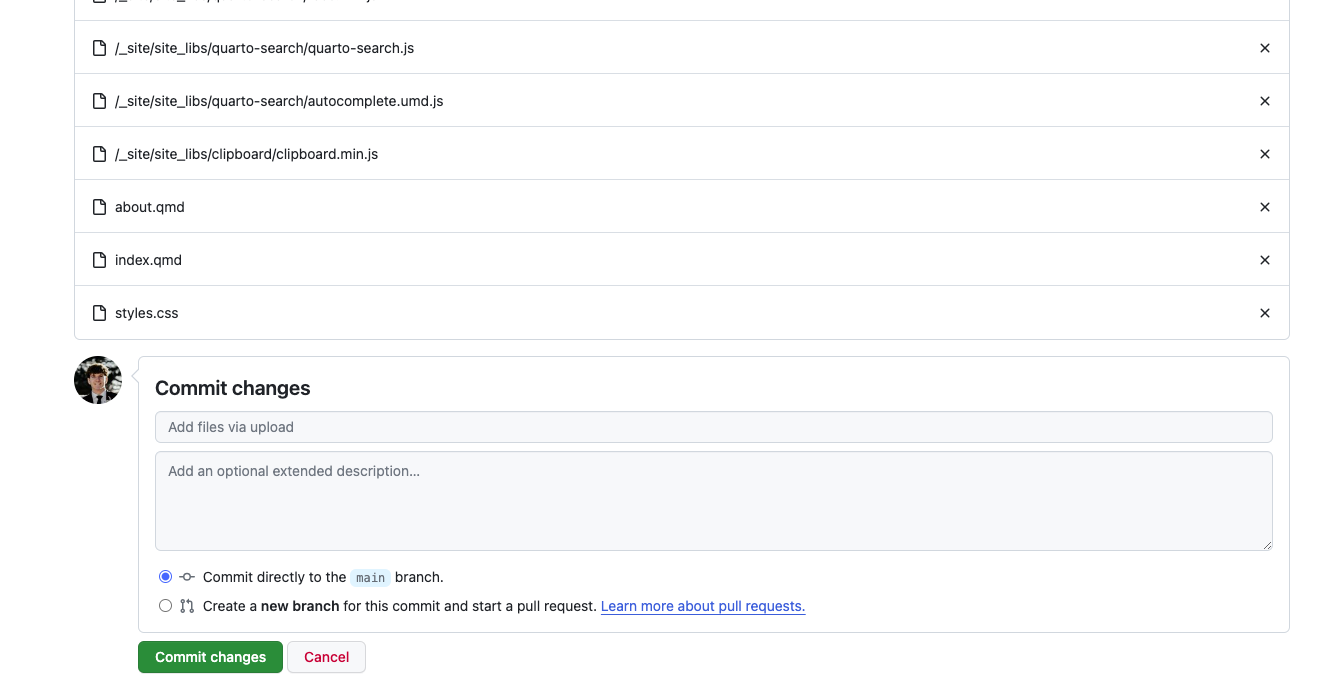
- Add Your Website Files: In your repo select the add file drop down and then select upload files. Next upload your website files that you created in Unit 3 Lesson 1 to the repository by highlighting and dragging and dropping into your repository.
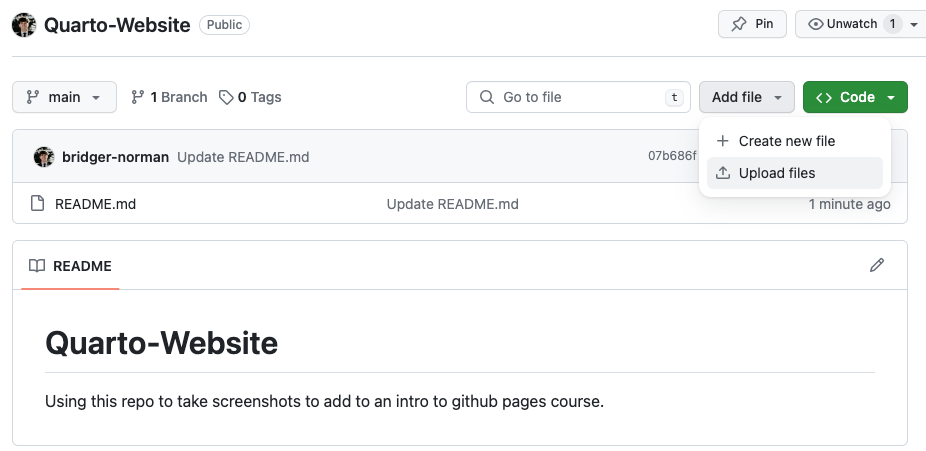
- Commit changes
- In your repository, go to the “Settings” tab and on the left nav bar select the “GitHub Pages” section. Under “Branch,” select the branch you want to use for our case
mainThen select where the html files will be read in our case/docs. Then click Save.
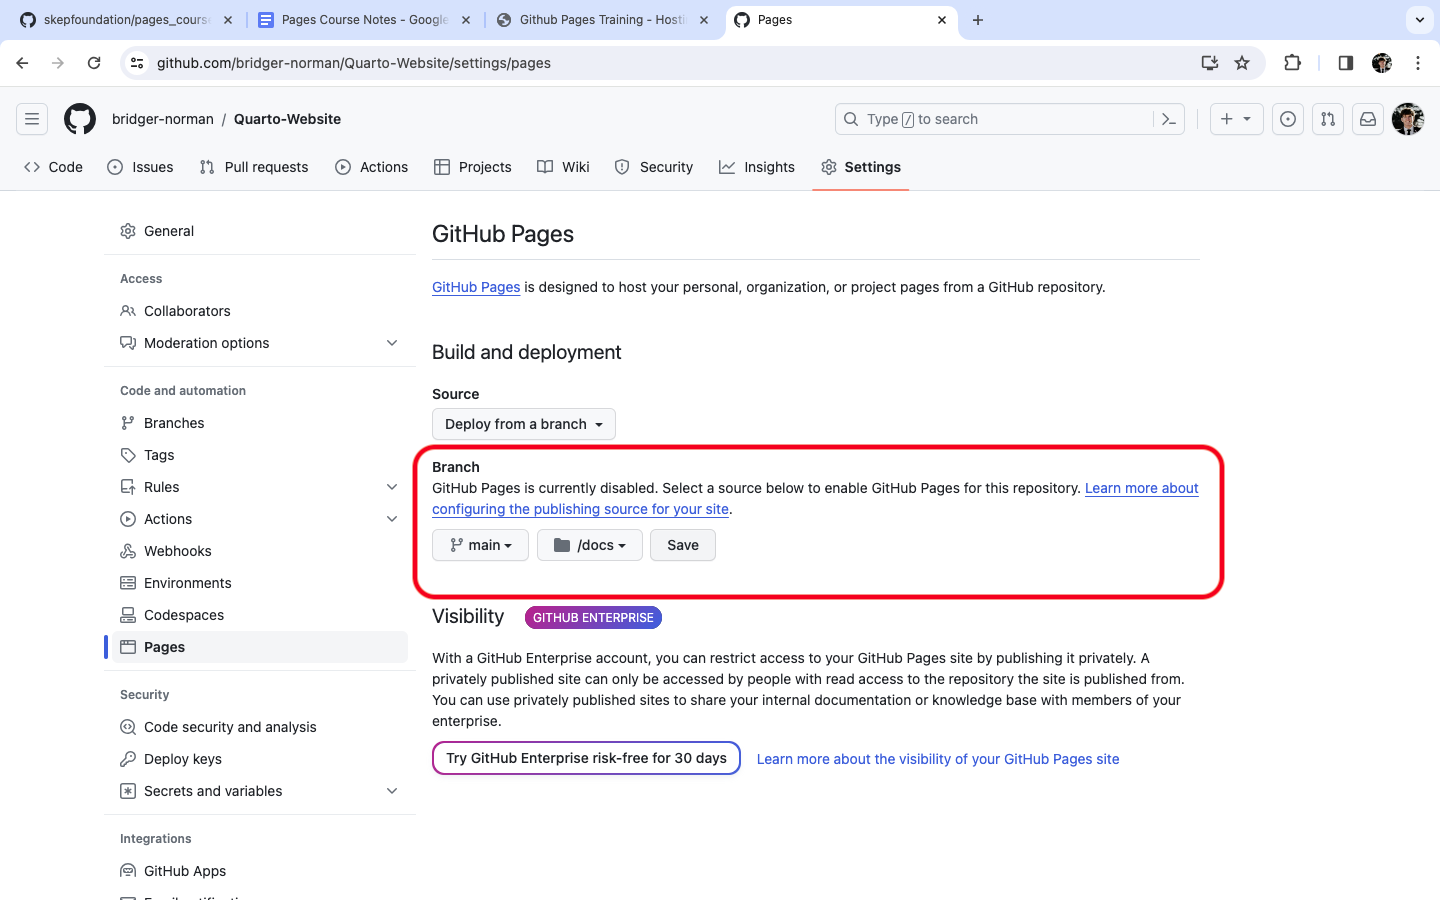
- The reason we will choose docs is because our
.htmlfiles are not located at the root folder they are in the default folder_site. So in order for github to publish our site we simply need to change the name of our folder from_sitetodocs. There are many approches to this. You could open the web editor by cliking.in your repo and change it in vscode for the web. You could clone the repo and change in vscode desktop app. Or you could change it before you even drag and drop the files in github in your computers file explorer. How you do it doesn’t really matter as long as your file structure in github looks like this:

And if you want your code to always render the html files into the docs folder the best way is to adress this problem is change the out put directory in your YAML as shown below. This will ensure everytime you render or preview your qmd file the html file will be ouput in the docs folder.
- Once this is done and commited to github go back to settings then to github pages and click on the view your site button. Note sometimes it takes Github a while to provide this link so be patient and refresh the page every now and then.
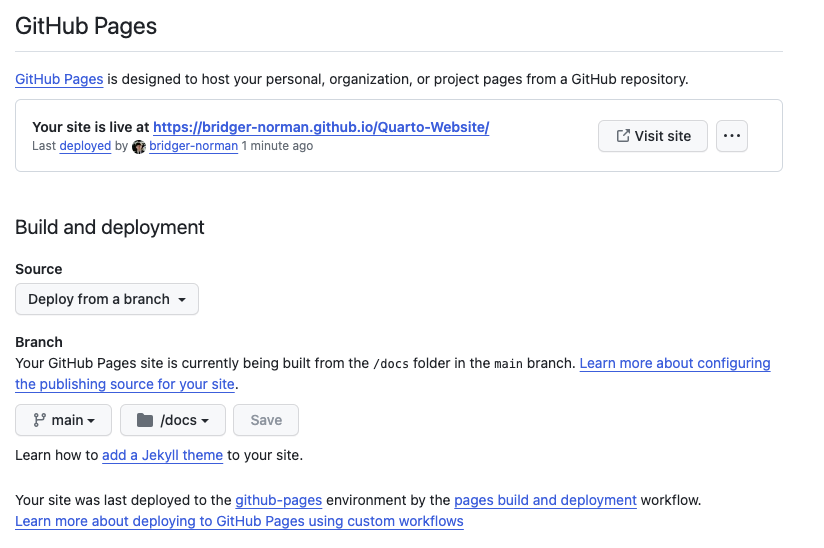
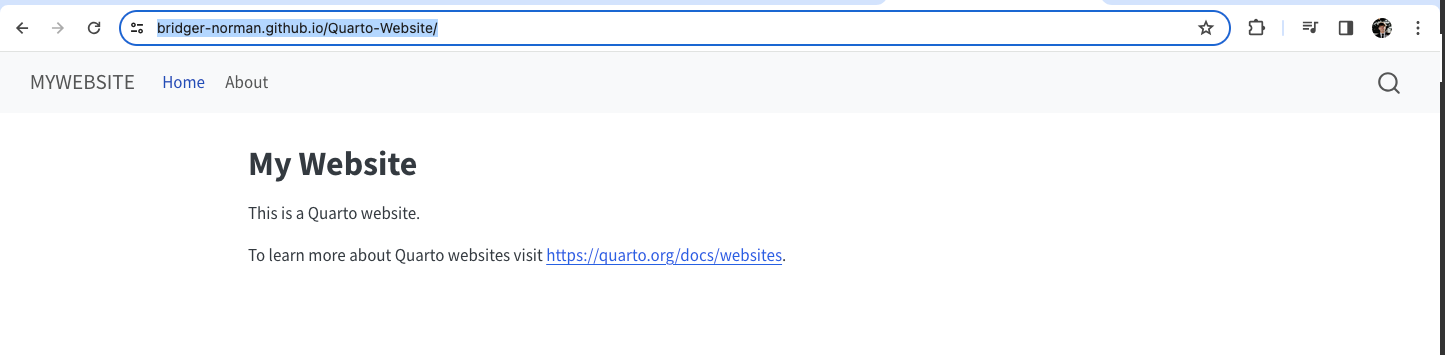
- The link should take you to your basic site that you created in Unit 3 Lesson 1, but now it is own the web for everyone to see!
Links
Here are some links to extra help and information if you are curious or in need.
Conclusion
You should now be able to view and share your website with everyone!